IT Support for Staff
IT Support for Staff / Moodle
Please select an area
How to Setup a Turnitin Assignment
Turnitin assignments help lecturers evaluate the originality of students’ work by comparing the submitted assignment to a database of online sources stored by Turnitin. It returns an originality report which highlights texts that appear in other sources and gives a rating based on how much of the text is potentially copied from other sources.
To create a new Turnitin assignment, you must add the Turnitin assignment to the moodle course page. Next, add a Start date, Due date, Post date and Max marks to each part of the assignment. Finally, you can open the turnitin app through moodle and add further settings within Turnitin itself.
Adding a Turnitin assignment to Moodle
1.On your course page, click Turn editing on (top right). Editing icons and links will appear.
2.In the Section where you will add a Turnitin assignment, click +Add an activity or resource (at lower-right of section). The Activity chooser will open.
3.In the Activity chooser, select Turnitin assignment. A description of the Turnitin assignment activity appears at right with links to help pages.
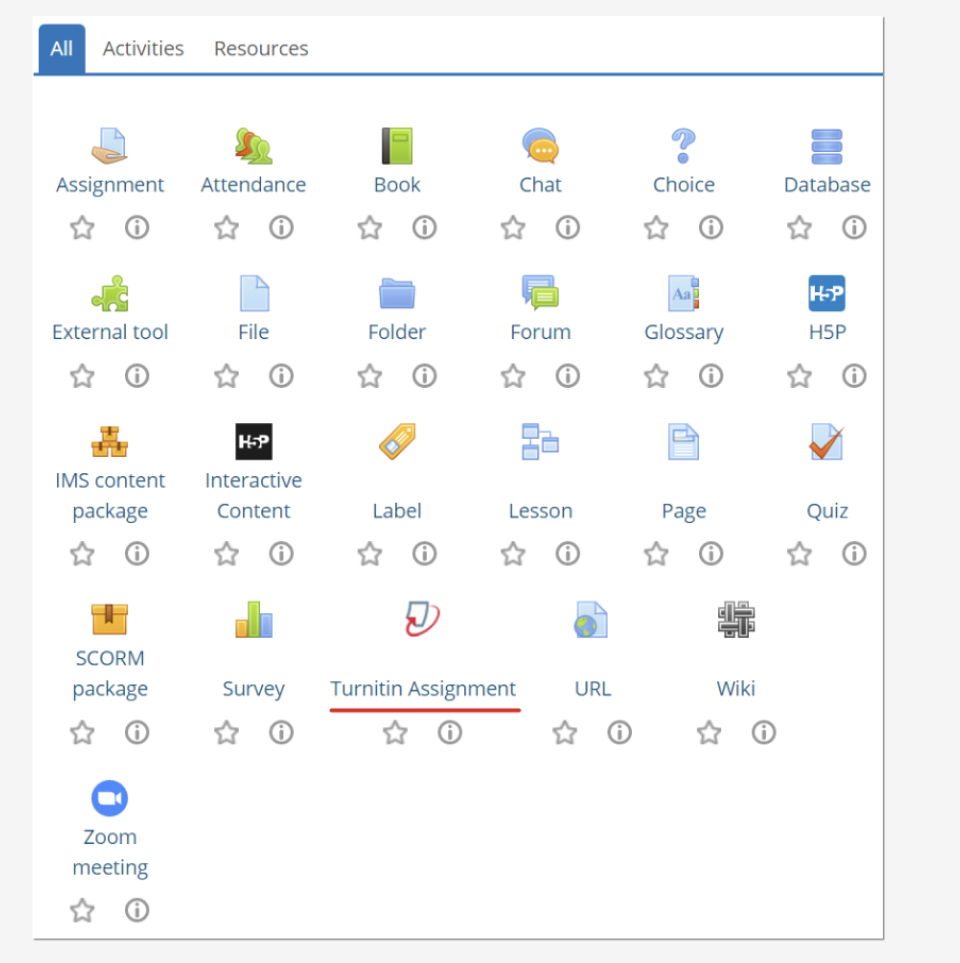
4.At the bottom of the Activity chooser, click Add. The Adding a new Turnitin assignment page will open.
5.To configure basic settings for the Turnitin assignment, see Turnitin Moodle Configuration (below).
6.After creating the assignment in Turnitin, give each part of the assignment its own Start date, Due date, Post date and Max marks.
Turnitin Moodle Configuration
When you add a Turnitin assignment activity to a Moodle course, you are required to set the assignment’s name, and the Submission Type. The remaining settings are optional. This section describes some of the common settings used by IMC lecturers.
Number of parts
Specify whether students can submit multiple parts of their assignment, for example if they should submit their assignment and cover sheet separately.
Note: If an assignment has been created with multiple parts, that each part must have its start date, end date, post date and max grade set separately.
Student Originality report
Specify whether students can see the Originality Reports that Turnitin generates. The default is No.
Turnitin Advanced Options -> Allow late submissions to be submitted.
Set this to Yes if you want to allow students to submit beyond the due date. Late submissions will have their submission time highlighted in red in the submission box.
Grade
Enter the maximum points that can be earned. The default is 100.
After creating the correct settings, press the Save and display button on the bottom of the page. This will create the Turnitin assignment in Moodle. Now, we need to edit each part of the assignment for its start date, due date, post date and max grades.
Turnitin Moodle Parts Configuration
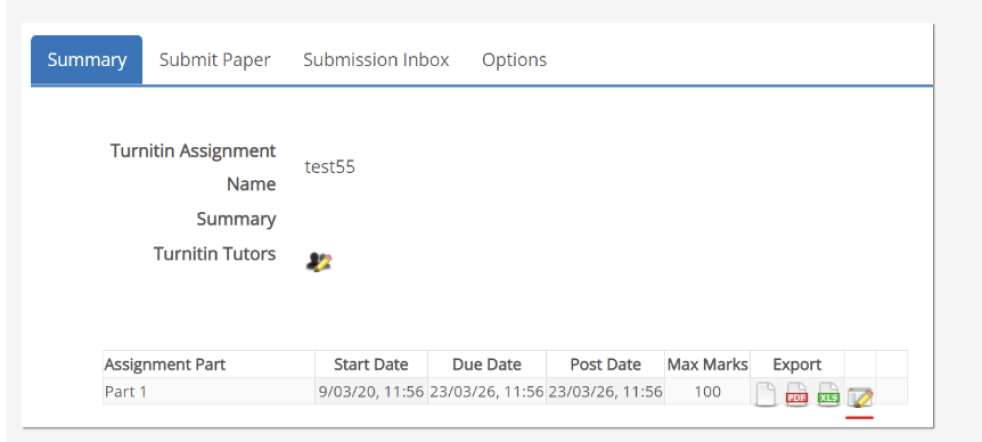
Click on the edit button for each part of the assignment, then input the correct Start date, Due Date, Post Date and Max marks for each part of the assignment.
Start Date The earliest date that students can start to submit their assignment.
Due Date The latest date that students can submit their assignment. If the late submission option is enabled, students will still be able to add to their assignment, but not edit an existing assignment.
Post Date The date that students will be able to see their marks and lecturer reviews on their assignments.
Max Mark Enter the maximum points that can be earned in this part. The default is 100.
Moodle Grade Setup
Grade calculations
A grade calculation is a formula used to determine grades, based on other grade items. It is used to create a total grade for all students in a moodle subject, provided that the grades of all graded items are entered and the correct calculations are set.
Grade calculations follow the pattern of formulas/functions in popular spreadsheet programs. They start with an equal (=) sign, and use common mathematical operators and functions to produce a single numerical output. This output is then used as the computed value for the grade item you are editing.
Grade Setup Example
Please see the below video to see an example of a gradebook setup. In the example given, there are three grade items.
- Quiz A, marked out of 15, worth 15% of the total marks for the course
- Assignment B, marked out of 50, worth 35% of the total marks for the course
- Final Exam C, marked out of 100, worth 50% of the total marks for the course
The final calculation is: =[[A]]+[[B]]*0.7+[[C]]*0.5
Uploading Large files to Moodle
IMC Moodle only allows for files of up to 100MB to be uploaded directly to Moodle. To circumnavigate this, we encourage staff members to first upload larger files to their IMC Google drive, then provide a link to the resource in Moodle. This way, large files can be accessed through Moodle without overloading the Moodle system.
Uploading Large Files into Moodle Example.
How to create ZOOM classes in Moodle
Zoom is a high-quality video and audio online conferencing tool for desktops, tablets and smartphones. This guide sets out the basics of how lecturers can set up zoom through IMC moodle, and how to create and host zoom meetings.
Adding the ZOOM Plugin to your Moodle Site
Go to your Moodle page, click Add an activity or Resource and select External tool.
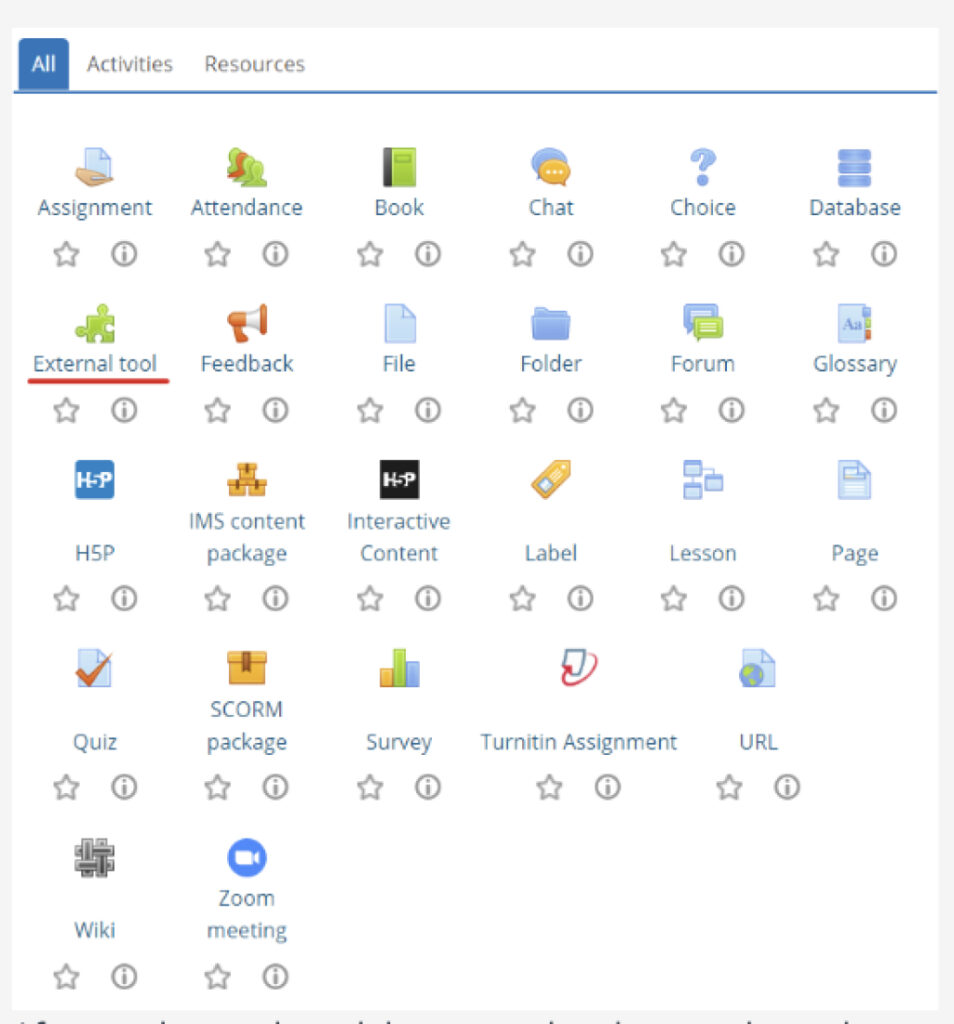
After you have selected the external tool, name the tool an appropriate name and from the Preconfigured tool drop down menu select IMC Zoom Class.
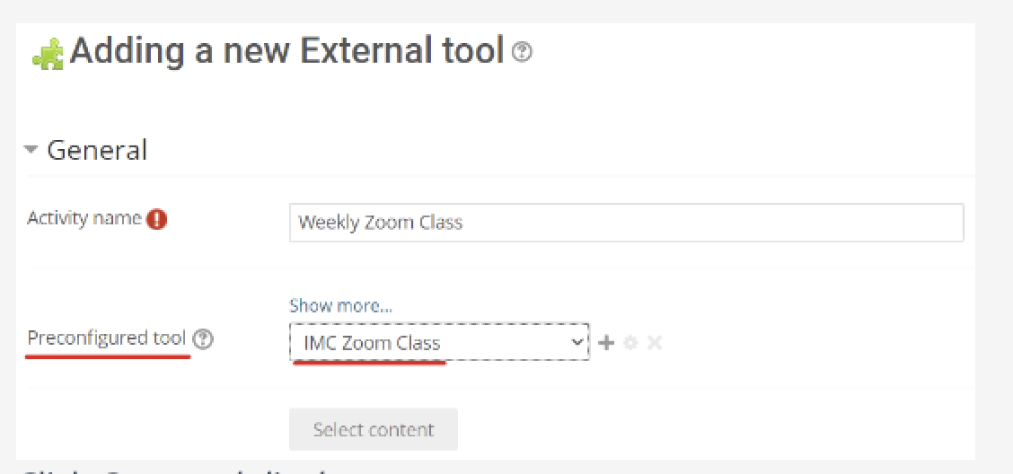
Click Save and display.
Adding scheduled Meetings in The zoom external application
Open the external tool and select Schedule a New Meeting.
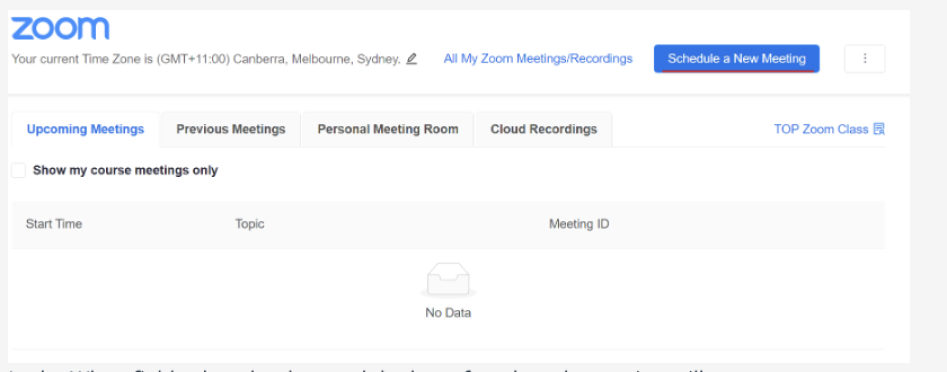
In the When field select the date and the hour for when the session will start. In the Duration field select the in hours and minutes of the expected length of the class.
Recurring meetings can be set up to run at the same time weekly. This is useful if you have a class at the same time each week.
To set up the recurring meeting, please see the sample setup of a meeting that occurs once every Tuesday for 7 weeks.

Select Record the meeting automatically and make sure In the cloud is selected. You can skip this but you have to remember to record when the meeting starts.
Click Save and return to your unit site in Moodle.
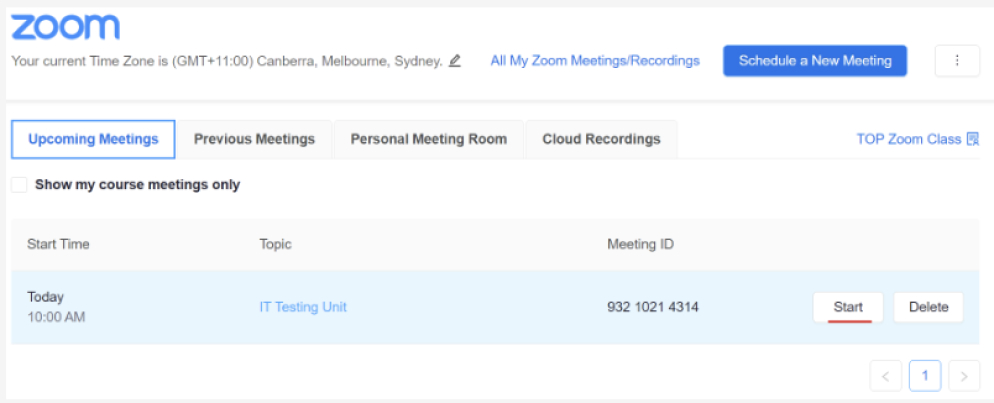
Open the external tool and click start to start the Zoom Meeting.
